5 Navigation Apps That Leave Google Maps in the Dust for Bikepacking
Navigation apps for bikepacking have gotten complicated with all the new features and subscription models flying around. As someone who has gotten lost more times than I’d like to admit on backcountry gravel roads, I learned everything there is to know about which apps actually deliver when you’re 50 miles from cell service. Today, I will share it all with you.
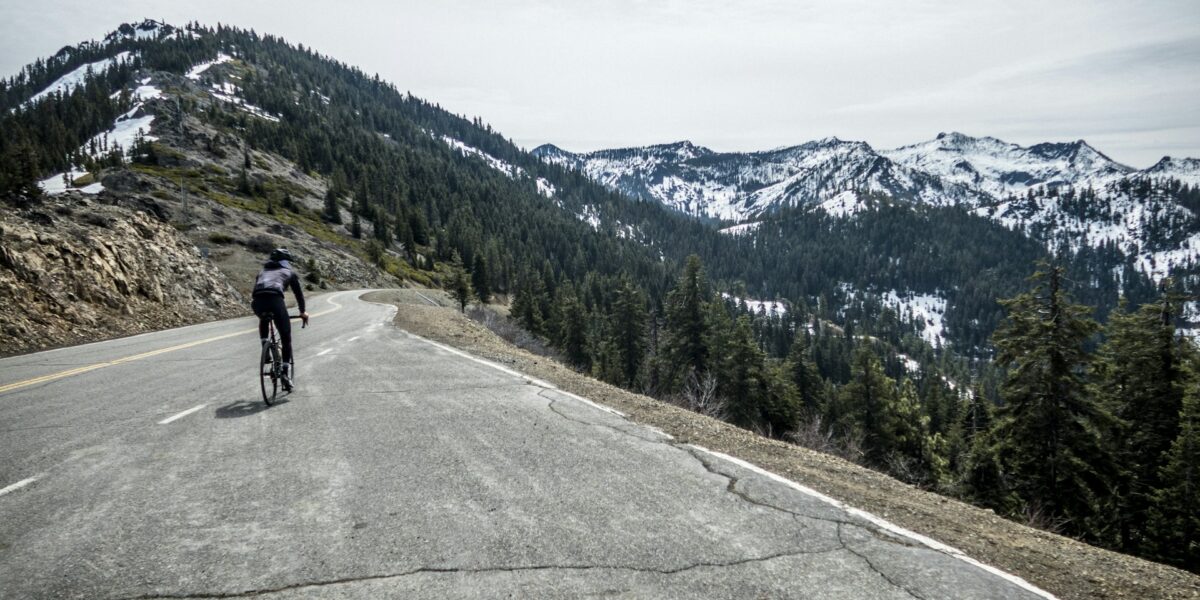
Here’s the thing — Google Maps will technically get you from point A to point B. But for bikepacking, you need way more than basic directions. You need terrain data, offline capability, route sharing from riders who’ve actually been there, and surface type information that Google simply doesn’t have in its database. I found this out the hard way on a ride through central Oregon when Google routed me onto a “road” that turned out to be a washed-out jeep track. These five apps exist because Google can’t do what we need it to do.
Why Google Maps Falls Short for Bikepacking
Probably should have led with this section, honestly. Google Maps treats bicycles like slow cars. Its routing algorithm follows roads, actively avoids what it considers “difficult” terrain, and prioritizes the fastest path rather than the most rideable one. For a weekend bikepacking trip, this approach will happily send you onto a busy state highway while ignoring a quiet, gorgeous gravel road running parallel just a quarter mile away. Ask me how I know.
The fundamental problem: Google optimizes for efficiency. Getting you there fast. But bikepacking is about the experience — scenic routes, rideable surfaces, avoiding traffic, finding the back roads nobody else knows about. Generic navigation apps can’t tell the difference between smooth, packed gravel and rocky, unrideable jeep trail. They can’t distinguish between a quiet back road and a shoulderless highway with logging trucks blasting past at 60mph.
The offline problem: Cell service evaporates fast once you leave pavement. Google Maps needs a connection for its dynamic routing features, and even its downloaded offline maps lack the detail cyclists need for route decisions. The dedicated cycling apps I’m about to cover solve this with comprehensive offline functionality built from the ground up, not bolted on as an afterthought.
Ride With GPS: The Route Planning Powerhouse
Ride With GPS has become the de facto standard for serious bikepacking route planning, and there’s good reason for that. Its strength is the massive library of user-created routes combined with planning tools that actually understand what surface types exist along your route.
Route library: Over 20 million public routes created by real cyclists. You can search by location, distance, and difficulty. Many of the established bikepacking routes — the GDMBR, the Oregon Timber Trail, the Arizona Trail — are mapped in incredible detail by riders who’ve completed them, with notes about water sources, camping spots, and sections where you’ll be pushing your bike. This crowdsourced knowledge is worth more than any algorithm.
Surface type data: This is the killer feature for me. The planning interface actually shows you what surface types you’ll encounter — paved, gravel, dirt, singletrack. No more ugly surprises where your “gravel route” includes 15 miles of hike-a-bike through a rocky wash. I’ve learned to check this layer religiously before committing to any route.
Cue sheets and turn-by-turn: Generates detailed cue sheets that work even without looking at a screen. You can export to GPS devices or print paper backups (old school, but it works). Voice navigation functions when you’ve got a connection, and the app provides audio cues for upcoming turns so you’re not constantly staring at your phone while riding.
Offline maps: Download entire route corridors for offline use. The downloaded maps include your route overlay and enough surrounding terrain detail to navigate back on course if you miss a turn or need to improvise a detour.
Best for: Serious planners who want to build custom routes with confidence about what the ground actually looks like. The free tier handles basic needs; the $50/year premium subscription opens up advanced features like surface type filtering and unlimited offline map downloads. I think the premium is worth it if you ride more than a couple times a year.
Komoot: The European Standard That’s Taken Root in America
Komoot has absolutely dominated European cycling navigation for years and has been steadily building strong coverage in North America. Its voice navigation and surface type awareness make it particularly good for exploring unfamiliar territory.
Smart routing: Tell Komoot what kind of bike you’re on — road, gravel, mountain — and it adjusts route suggestions to match your equipment. The algorithm draws on millions of recorded rides to suggest routes that match not just your bike but your fitness level. It’s surprisingly good at this.
Highlights: User-contributed points of interest mark viewpoints, water sources, and interesting stops along routes. This crowdsourced layer adds context that pure mapping data simply can’t provide. I’ve found some incredible swimming holes and viewpoints this way that I never would have known about otherwise.
Turn-by-turn voice navigation: Reliable voice directions that work with the phone screen off, which is huge for battery preservation. This is particularly useful on gravel roads where looking down at a phone screen means you’re about two seconds from catching a rut and eating dirt.
Regional maps: You purchase individual region maps for offline use. The pricing works out to about $4 per region, or $30 for the entire world package. It can add up if you ride in lots of different areas, but the offline coverage quality is genuinely excellent.
Integration: Syncs cleanly with Garmin, Wahoo, and other GPS devices. Plan on the app using its superior interface, then push the route to your dedicated device for riding. That’s what makes Komoot endearing to us gadget-loving bikepackers — it plays nice with everything else in your tech setup.
Best for: Riders who want solid voice navigation and are willing to invest in quality regional maps. Particularly strong in areas with European-style cycling infrastructure, but its North American coverage has gotten really good in the last couple years.
Gaia GPS: The Backcountry Navigation Expert
Gaia GPS isn’t specifically a cycling app — it’s a backcountry navigation tool used by hikers, hunters, overlanders, and anyone else who spends time far from roads. But for remote bikepacking, that broader wilderness focus actually becomes a major advantage.
Map layer variety: Access dozens of different map layers — USGS topographic maps, satellite imagery, forest service road networks, public lands boundaries. You can layer these on top of each other for a comprehensive picture of the terrain you’re riding into. I usually run the topo layer with public lands overlay and it tells me almost everything I need to know.
Public lands data: Shows land ownership boundaries, which helps you identify legal camping spots on BLM and Forest Service land. If you’re riding multi-day routes through the American West, knowing where you can and can’t legally pitch a tent is crucial information that other apps just don’t provide.
Track recording: Records your route with elevation and speed data as you ride. Export tracks as GPX files for sharing, or import other riders’ GPX tracks to follow their routes. The GPX ecosystem is the common language of backcountry navigation.
Offline reliability: Download massive map areas for offline use. Gaia was designed from day one for wilderness use where cell connectivity simply doesn’t exist — exactly the conditions where serious bikepacking happens. When my phone shows “No Service,” Gaia still shows me exactly where I am and where I need to go.
Navigation tools: Compass, GPS coordinates, distance and bearing calculations. These old-school tools become essential when trails don’t match what the map shows and you need to navigate by terrain features rather than turn-by-turn directions. It’s happened to me more than once.
Best for: Remote backcountry routes where detailed topographic information and public lands data matter more than pretty turn-by-turn directions. The $40/year subscription gives you access to all the premium map layers. Worth every penny for serious backcountry riding.
OsmAnd: The Privacy-Focused Open Source Option
OsmAnd runs on OpenStreetMap data, which gives you global coverage with full offline capability and zero subscription fees. It’s built by and for people who value data privacy and open-source software, and it has a devoted following among bikepackers.
Free offline maps: Download entire countries for offline use without paying a dime in subscription fees. The map data comes from OpenStreetMap, which is constantly being updated by volunteers worldwide. In many areas, especially popular cycling regions, the OSM data is actually more detailed and current than commercial alternatives.
Cycling profiles: Configure routing for different bike types, and the app considers surface type, elevation gain, and road classification when building route suggestions. It takes some initial setup to get the profiles dialed in, but once configured it routes well.
Track recording: Records GPX tracks with configurable detail levels. Import tracks from any source to navigate established routes. Full GPX compatibility means it works with the broader bikepacking route-sharing ecosystem.
Privacy: No account required. No tracking. No data collection. Your route data stays on your device unless you make a conscious choice to export it somewhere. In an age where every app wants to harvest your location data, this matters to a lot of riders.
The learning curve: I’ll be straight with you — the interface isn’t as slick or intuitive as the commercial alternatives. Expect to spend some quality time in the settings menus configuring things to your preferences. There are forums and guides that help, but it’s not a plug-and-play experience.
Best for: Budget-conscious riders who want robust offline capability without recurring subscription costs. Also a strong pick for privacy-conscious users who want full control over their data and don’t want their rides ending up in some company’s database.
Trailforks: When Your Route IS the Trail
Trailforks focuses specifically on trail networks rather than road routing. If your bikepacking route relies heavily on singletrack, this app provides a level of trail detail that road-focused apps simply can’t match.
Trail condition reports: Real-time updates posted by other riders about current trail conditions — wet, dry, muddy, closed for maintenance. This information alone can save your entire trip when spring melt or recent storms have made trails unrideable. I’ve rerouted plans multiple times based on Trailforks condition reports.
Trail difficulty ratings: A consistent rating system that helps you understand exactly what you’re getting into before you commit to a trail segment. No more guessing whether “intermediate” means the same thing in Montana as it does in Vermont.
Network maps: Displays trail systems as interconnected networks rather than isolated individual routes. This is incredibly useful for exploring new areas and connecting separate trail segments into longer bikepacking routes.
Descent planning: For routes with technical descents, Trailforks maps out trail features and highlights challenging sections. You can preview what you’ll encounter before dropping into something you might not be ready for. Saves some nasty surprises.
Best for: Routes built around singletrack trail networks. Less useful for road and gravel-focused routes, but genuinely invaluable when trails form the backbone of your bikepacking trip.
Building Your Navigation Stack
Here’s a secret that took me a few years to figure out: most serious bikepackers don’t rely on just one app. They run a stack that combines the strengths of different tools. Here’s what a solid setup looks like:
Planning phase: Ride With GPS or Komoot for building routes with surface type awareness and community input from riders who’ve been there before you.
Backup navigation: Gaia GPS with downloaded topographic maps for when things go sideways — when trails are washed out, when you need to improvise a detour, when the planned route just doesn’t work.
Trail detail: Trailforks loaded up for any singletrack sections where real-time condition reports could make or break your day.
Device integration: Export your finalized routes to a Garmin or Wahoo device for battery-efficient navigation that doesn’t require burning through your phone battery all day.
The Case for Dedicated GPS Devices
Phone apps have gotten dramatically better in the last few years, but dedicated GPS devices still hold real advantages for multi-day trips. Here’s why I carry both:
Battery life: 20+ hours on a GPS device versus 4-6 hours on a phone with the screen running. On a three-day ride through remote terrain, that gap is enormous and potentially dangerous.
Durability: Purpose-built for outdoor abuse, with water resistance and impact protection that consumer phones just can’t match. I’ve dropped my Garmin in creeks, bashed it on rocks, and ridden through driving rain. It keeps working.
Screen visibility: Transflective displays stay perfectly readable in direct sunlight, where phone screens wash out to the point of uselessness. If you’ve ever tried to read a phone screen at noon on a exposed mountain road, you know the struggle.
Phone preservation: Your phone is your emergency communication device. Draining its battery on navigation means it might be dead when you actually need to call for help. Keep your phone charged and protected; let the GPS device handle the nav work.
My ideal setup: plan everything on apps where the interfaces are superior, export the finalized route to a dedicated GPS device for actual riding, and keep the phone as emergency backup with full battery.
Before You Ride
Test offline functionality at home: Enable airplane mode before you leave the house and verify that your downloaded maps and routes work completely offline. Some apps advertise offline capability but still need a connection for certain features. Find out at home, not 30 miles into the backcountry.
Download generous map areas: Extend your downloads well beyond the planned route corridor. If you need to detour around a washed-out section or evacuate due to injury or weather, you’ll want map coverage for the alternatives too.
Carry a paper backup: Print cue sheets and overview maps. I know it feels old-fashioned, but paper doesn’t run out of battery, doesn’t crash, and doesn’t care about water or cold. I’ve used my paper backup exactly twice in years of riding, and both times I was very glad I had it.
Know your bail-out options: Before you leave, identify towns and roads along your route that can get you back to civilization if problems come up. Mark these bail-out points in your navigation app so they’re right there when you need them.
Navigation technology has made bikepacking more accessible and safer than it’s ever been. But the best navigators I know still understand a fundamental truth: apps are tools, not substitutes for solid planning, good judgment, and the ability to read terrain and make decisions when the technology inevitably lets you down.


Stay in the loop
Get the latest adventure cycling world updates delivered to your inbox.