Rear Derailleur Not Shifting Smoothly — Fix It Fast
Rear derailleur troubleshooting has gotten complicated with all the conflicting advice flying around. As someone who spent three seasons working part-time at a local bike shop in Portland before going full-time into cycling content, I learned everything there is to know about sluggish shifting. Today, I will share it all with you.
Most riders I watched come through that shop — chain hesitating between cogs, mid-ride panic setting in — made the same mistake. They chased cable tension endlessly. Turned the barrel adjuster six, seven, eight times. Never fixed anything for long. There’s a better way. A specific diagnostic sequence that actually works, borrowed directly from the mechanics I trained under. Follow it in order and you’ll solve this in under an hour.
What Is Actually Causing the Problem
But what is a shifting problem, really? In essence, it’s a mismatch between where your derailleur sits and where it needs to be. But it’s much more than that — because four completely different culprits can produce identical symptoms, and confusing one for another wastes hours.
- Cable tension too loose or too tight — Chain struggles to move up or down the cassette, usually one direction noticeably worse than the other.
- Bent derailleur hanger — The derailleur angles wrong even when cable tension is perfect. Smooth shifting becomes impossible across every gear, not just a few.
- Limit screw misalignment — The derailleur either won’t reach the smallest cog or can’t back off from the largest one. Very fixable. Often overlooked.
- Worn jockey wheels or damaged parallelogram — The hardware itself is failing. No cable adjustment in the world will save you here.
Those four account for roughly 95% of cases. Knowing which one you’re dealing with before you touch anything — that’s what separates a twenty-minute fix from a three-hour spiral. So, without further ado, let’s dive in.
Start Here — Cable Tension and Barrel Adjuster
Cable tension is where most riders begin, and honestly, it’s the right place. Just don’t stop there.
Shift into the middle of your cassette — fourth or fifth cog on a nine-speed, sixth or seventh on an eleven-speed. Watch which direction feels sluggish. Chain struggling to climb toward the smallest cog? Cable too loose. Hesitating dropping toward the largest cog? Too tight. That directional detail tells you everything before you touch a single screw.
Find your barrel adjuster. On most modern derailleurs — Shimano 105, SRAM Rival, whatever you’re running — it’s the grooved collar where the cable enters the derailleur body. Turn it counterclockwise a quarter turn if you need easier upward movement. Clockwise if you need easier downward movement. Test. Repeat.
Here’s the critical threshold though. More than four quarter-turns and the shift still isn’t smooth? You’re not dealing with a cable tension problem anymore. You’ve got cable routing, fraying, or hanger alignment underneath it. The barrel adjuster hits a ceiling. A properly tensioned cable feels firm under load — not squishy, not over-tight.
I’m apparently someone who skips visual checks entirely, and that approach burned me badly once on a borrowed gravel bike with a Shimano 105 rear derailleur. Eight barrel adjustments deep. Cable had bunched up inside the housing the whole time. Probably should have opened with a visual cable inspection, honestly. Don’t make my mistake.
Check Your Derailleur Hanger If the Fix Won’t Hold
This is where patience separates a successful repair from the endless adjustment spiral. That’s what makes this step so endearing to us mechanics — it’s the one everyone skips and everyone regrets.
Frustrated by stubborn shifting that fixed itself and then broke again fifty miles later, I started checking hangers on every single bike that came through the stand. Night and day difference. A bent hanger mimics cable tension problems almost perfectly — you adjust, it holds for a while, then goes mushy again. You’re chasing a moving geometric target with a mechanical tool. Doesn’t work.
Two methods. Visual first: stand directly behind the bike and sight down the cassette toward the derailleur. The jockey wheel should track clean under each cog. Any offset left or right — even slight — and your hanger is bent. Tool method: a Park Tool DAG-2 alignment gauge runs about $45 and is worth every dollar if you ride more than twice a week. Place it on the hanger, spin the wheel slowly, and deflection shows up immediately.
Here’s the reality. Derailleur hangers are consumable parts — intentionally soft aluminum, designed to absorb impact so your $150 derailleur doesn’t. Replacements run $25 to $60 depending on frame manufacturer. Five minutes of work with a 5mm Allen key. Carbon frames sometimes shatter the hanger instead of bending, which is honestly worse, but the replacement process is identical either way.
Limit Screws — H and L Without the Confusion
Probably should have opened with this section, honestly. More confusion lives here than anywhere else in derailleur adjustment.
But what are limit screws? In essence, they’re physical stops that prevent the derailleur from traveling too far in either direction. But it’s much more than that — set them wrong and your chain either drops into the spokes or can’t reach the gear you need.
The H screw — high gear — stops the derailleur from overshooting the smallest cog. The L screw — low gear — keeps it from drifting past the largest cog into your wheel. One controls each end. No metaphors. No mystery.
Shift all the way to the smallest cog. Look at jockey wheel alignment under that cog. Not sitting directly beneath it? Adjust the H screw. Clockwise pulls the derailleur inboard. Counterclockwise lets it move outboard. Half-turn increments. Test each time.
Then shift to the largest cog. Same process with the L screw. Chain dropping toward the spokes means tighten L. Chain refusing to reach that biggest cog means loosen L.
When both screws run too tight, the derailleur fights cable movement between the extremes and shifting turns mushy everywhere. Too loose and it overshoots both ends. You want minimal resistance — just enough to prevent catastrophe, nothing more.
When to Stop DIYing and Take It to a Shop
While you won’t need a full professional overhaul for most shifting problems, you will need a handful of honest self-assessments. First, you should check the parallelogram carefully — at least if you’ve already worked through cable tension, hanger alignment, and limit screws with no improvement.
A Park Tool DAG-2 might be the best option for hanger checks, as derailleur diagnosis requires geometric precision. That is because a bent hanger of just 1–2mm produces symptoms indistinguishable from a cable problem to the naked eye.
Signs the hardware itself is failing: the parallelogram linkage bends so severely that limit screws can’t compensate, the cage cracks near a pivot point, or the mounting bolt spins without gripping. These aren’t adjustment problems. These are replacement scenarios — new derailleur running $80 to $200 depending on your groupset level.
I’m apparently someone who waited too long on a cracked derailleur cage once, and a Shimano Deore unit at $89 from my local shop fixed it immediately while three weeks of adjustments never did. Won’t be doing that again.
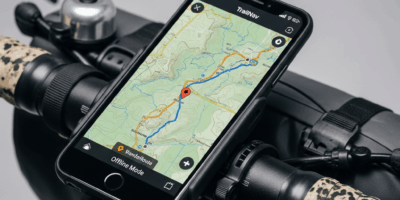
If you’re bikepacking remote terrain, running this full diagnostic sequence before you leave is worth twenty minutes of your life. Fifty miles from the trailhead is a terrible place to discover a failed hanger. If you’re commuting, a full shop diagnostic runs around $50 and delivers actual confidence rather than temporary quiet.
Cable tension, hanger alignment, limit screws, hardware damage. That’s the sequence. Test after every single step. You’ll either fix it yourself or know exactly what to hand a mechanic — and that’s the whole game.


Stay in the loop
Get the latest adventure cycling world updates delivered to your inbox.