Signs Your Handlebars Are Actually Too Low
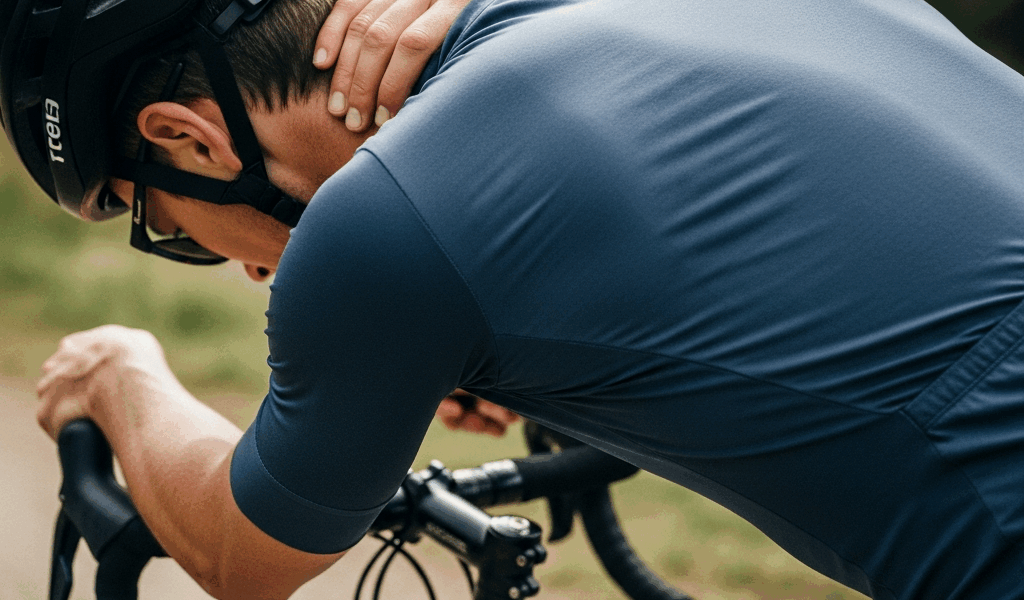
Handlebar fit has gotten complicated with all the conflicting advice flying around. But the real problem? Most riders don’t even realize their bars are too low until their body starts filing complaints — usually around the 45-minute mark, never on mile one.
As someone who spent an entire season blaming age for my neck pain and shoulder tightness, I learned everything there is to know about this particular misery. Turned out my bars had dropped nearly two inches during a stem swap I’d completely forgotten about. A 51mm difference. That’s it. That’s what was wrecking my rides.
Today, I will share it all with you.
Neck Stiffness and Pain
Low bars push your head and neck into sustained extension. Your cervical spine — specifically the muscles along the back of it, the upper trapezius especially — wasn’t built to hold that angle for an hour straight. After 45 to 90 minutes, those muscles start knotting up hard. Sometimes it’s a dull background ache. Sometimes it’s sharp tension radiating from your neck into your shoulders. Either way, you know.
Shoulder Tension and Upper Back Fatigue
When bars sit too low, you reach forward more aggressively than your body wants to. Your shoulders round. Your chest compresses slightly. The muscles between your shoulder blades work overtime just trying to keep you stable over the bike. By the end of the ride, that tension lingers — sometimes well into the next morning. That’s what makes this problem so insidious to us cyclists who just chalk it up to a hard effort.
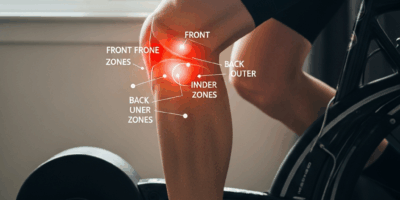
Hand Numbness or Tingling
This one’s sneaky. Low bars shift excess weight onto your hands, which puts pressure on the ulnar and median nerves running down your palms. Shake your hands out mid-ride and the tingling comes back within minutes? Classic sign. Don’t ignore it. I did, for about four months, and it wasn’t fun.
Constantly Reaching Forward
Probably should have opened with this section, honestly. Stop your ride, stand up off the bike, then clip back in. Does it feel like you’re stretching forward to reach the bars? Like you bought a frame one size too large? Low bars create exactly that sensation — even on a perfectly sized frame. You’re arched forward unnaturally, and your body knows it even when your brain argues otherwise.
Diagnose before you wrench. A lot of riders fiddle endlessly with their setup without actually confirming what the problem is. Don’t make my mistake.
What You Need Before You Start
The actual adjustment is straightforward. Gathering what you need takes longer than the work itself.
Tools
- Hex key set — 4mm, 5mm, and 6mm cover most stem bolts out there
- Torque wrench with a 5–10 Nm range (optional, but smart if you’ve got one collecting dust in the garage)
- A friend, or a mirror positioned so you can actually see your bar height without perching on the saddle
Materials
But what are stem spacers? In essence, they’re thin aluminum rings — usually 2mm, 5mm, or 10mm thick — that slide onto your steerer tube. But they’re much more than that. Moving spacers from below the stem to above it raises your bars without touching your wallet for new components.
If you don’t have any lying around, a 5-pack of 5mm aluminum spacers runs $8 to $15 on Amazon or eBay. I’m apparently a Ritchey person and their spacers work for me while the no-name knockoffs never feel quite right — but honestly, they’re all machined aluminum rings. Grab whatever’s in stock. You’ll use them eventually.
Threadless vs. Quill Stems
Most modern bikes run threadless stems. Straight steerer tube, stem clamps around the outside. Simple. If your bike is from the early 1990s or older — or a vintage city bike — you likely have a quill stem instead. That’s a wedge-shaped insert that slides up and down inside the steerer tube. The two adjustment processes are completely different, so figure out which one you have first.
Look at the top of your fork. Threadless setups have a separate cap bolted on top. Quill setups have a single bolt sticking straight up out of the stem itself. That tells you everything you need to know. That was 1992 engineering, and it’s still around.
How to Raise Handlebars on a Threadless Stem
So, without further ado, let’s dive in. This method applies to roughly 85% of bikes currently being ridden. If you already know the process, skip ahead. For everyone else — follow along closely.
Step One: Loosen the Stem Bolts
Your stem clamps to the steerer tube with two or four bolts on the face of the stem — the part pointing forward. Use your hex key to back them off until the stem spins freely. Don’t remove the bolts entirely. A quarter turn is usually enough. Just enough to free things up.
Step Two: Loosen the Top Cap
That cap sitting on top of the steerer tube — the one with a single center bolt — loosen it counterclockwise. You’re not removing it. You’re releasing the preload on your headset bearings so the stem can actually move. Two or three turns should do it.
Step Three: Slide Spacers Upward
Below your stem, stacked against the headset, are your spacers. Pull them up over the steerer tube and position them above the stem. Moving a single 10mm spacer raises your bars 10mm. Two 5mm spacers give you the same result. Somewhere between 10mm and 30mm usually resolves minor discomfort without turning your handling into something unpredictable.
Critical detail — never leave the steerer tube exposed above the stem. The top cap needs direct contact with the stem to preload the bearings properly. Leave a gap and your headset will rattle, wear prematurely, and generally make your life worse.
Step Four: Re-tighten Everything
Start with the stem bolts. Tighten them evenly — alternate between top and bottom if your stem has four bolts. Proper torque for aluminum stems on aluminum forks is 5–6 Nm. No torque wrench? Tighten to “firm handshake,” not “you owe me money.” Then re-tighten the top cap bolt. Lighter touch here — 3–4 Nm at most, or you’ll preload the bearings too aggressively.
Spin your fork side to side. No grinding, no play? You’re done here.
How to Raise Handlebars on a Quill Stem
Older bikes — and plenty of city bikes still rolling around — use quill stems. Simpler design, easier adjustment. That’s what makes quill stems endearing to us vintage bike enthusiasts.
Frustrated by overthinking it, most people just loosen the top bolt counterclockwise — maybe two full rotations using a 6mm hex key — and pull the stem straight up to the desired height using their own two hands. The stem itself usually has a minimum insertion line stamped into the shaft. Never raise it above that line. Expose the wedge mechanism and the stem loses its grip entirely. Bad outcome.
Once positioned, tighten the bolt back down. Then grab the bars and twist hard side to side — they shouldn’t slip or rotate at all. Quill stems rarely need more than firm hand pressure. This new adjustment approach took off among city riders years ago and eventually evolved into the casual wrench-it-yourself method cyclists know and trust today.
How to Test the New Position on the Road
You’ve raised your bars. Good. Now patience actually matters here.
Take a 20 to 30-minute test loop — something familiar, with flat sections and a couple of gentle climbs mixed in. Pay attention to how your body feels, not just how the bars feel. Improved position doesn’t feel dramatically different. It feels quieter. Your neck sits more neutral. Your shoulders stop bunching up around your ears. Hand numbness disappears or drops off significantly.
While you won’t need to overhaul your entire fit in one session, you will need a handful of test rides before drawing conclusions. Three or four rides minimum. Your body needs time to reorient to the new position, especially if you’ve been suffering through the wrong one for months.
If spacers alone don’t fully solve the problem, a longer stem or riser bars might be the best option, as serious fit issues require geometry changes — not just height adjustments. That is because handlebar height and reach work together, not independently. That’s a separate conversation. But the foundation is always identical: diagnose first, then adjust one variable at a time.

Stay in the loop
Get the latest adventure cycling world updates delivered to your inbox.