How to Plan Your First Bikepacking Trip — A Weekend Starter Guide
Planning your first bikepacking trip is genuinely one of the better decisions you can make this year. I say that as someone who spent three summers doing loaded touring on paved roads before a friend essentially shoved me onto a gravel trail with a framebag and said “just go.” That first weekend changed how I ride. It also taught me that most of the advice floating around online is either a deep dive into ultralight gear obsession or a hand-wavy “just get out there!” that tells you absolutely nothing useful. This guide is neither. It’s what I’d tell you over coffee if you asked me to help you plan a two-day bikepacking trip from scratch — with real numbers, real routes, and real warnings about the dumb stuff I did so you don’t have to repeat it.
Start With a Weekend, Not a Week
Every person I’ve ever introduced to bikepacking wanted to start with an ambitious multi-week route. The Colorado Trail. The Katy Trail end to end. Something with a name. I get it. But a four-day weekend — Friday evening departure through Sunday afternoon return — is where actual skills get built. Not reading about bikepacking. Doing it for 48 hours.
Here’s what a two-night trip teaches you that a single overnight doesn’t: how to ride tired. Day one feels great. Day two, your sit bones are talking to you, your bag shifts, and your knees remind you that 2,200 feet of climbing is not the same as 2,200 feet on a training ride. You also learn your packing system under pressure. The thing you stuffed into your seat bag at the bottom? You’ll need it first. Guaranteed.
Keep your first route under 100 miles total. That’s roughly 45-55 miles per riding day with buffer for stops, exploring, and the inevitable wrong turn. Most people overestimate how fast they move with a loaded bike. Your average speed drops. On gravel, with a full setup, 8-10 mph is a perfectly respectable cruise. Plan around that, not your Strava PR.
Build in a Bailout — Every Time
A bailout isn’t admitting defeat. It’s smart route design. Before I leave for any trip, I identify at least one point — usually around the 40% mark of the route — where I could reasonably call someone, catch a bus, or ride pavement back to a trailhead if something went wrong. A busted derailleur hanger at mile 20 of 90 is a very different problem when you’re four miles from a paved road versus 40 miles from anywhere.
On my first bikepacking trip in the Ozarks, I didn’t build in a bailout. My rear tire sidewall tore on day two, about 28 miles from the car, on a doubletrack section with no cell service. I had a boot — a folded gel wrapper, which works in a pinch — but the confidence cost of that situation was real. Build the bailout into the plan before you leave. You probably won’t need it. But you’ll ride more relaxed knowing it exists.
Where to Camp
Your two best options for a first trip: dispersed camping on National Forest or BLM land, or a campsite you’ve pre-booked along the route. Dispersed camping is free and flexible, but it requires some navigation and comfort with “finding a spot.” For a first trip, there’s nothing wrong with booking a state park campsite — $15 to $25 a night in most places — and knowing exactly where you’re sleeping. Remove variables early. Add them as you get comfortable.
The Gear You Actually Need vs Nice to Have
Probably should have opened with this section, honestly, given how many first-timers get paralyzed staring at bikepacking gear reviews for three months without ever leaving.
The minimal viable bikepacking setup is smaller than you think. You don’t need a framebag custom fitted to your bike’s triangle. You don’t need a $400 sleeping system on day one. Here’s what you actually need to get through a weekend:
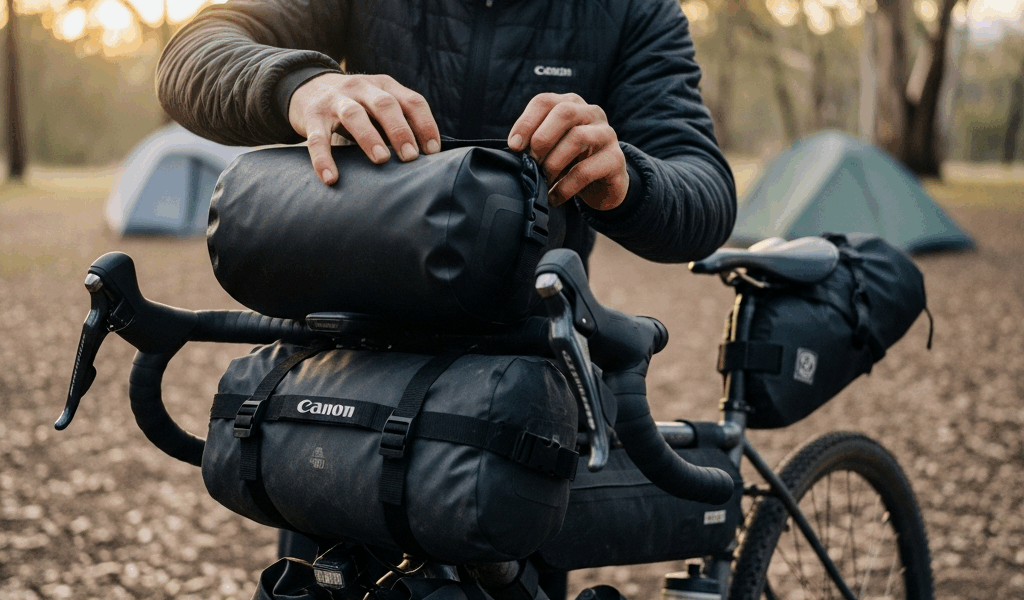
- A way to carry stuff on the bike — framebag, seat bag, or even a dry bag strapped to your rack
- Shelter — a tent, bivy, or tarp
- A sleeping bag rated to the expected low temperature
- A sleeping pad (this matters more than most people think — cold ground kills sleep)
- Water treatment — filter or tablets
- A small cookstove or willingness to eat cold food
- Tools — tire levers, spare tube, patch kit, multi-tool, pump
- Navigation — a phone mount and downloaded offline maps
- Clothing layers for the expected conditions, plus one warmer layer than you think you need
That’s it. Seriously.
Borrow Before You Buy
Bikepacking bags are expensive. A full setup from Revelate Designs or Apidura — seat bag, frame bag, top tube bag, and handlebar roll — can easily run $400 to $600 total. For a first trip, borrow what you can. Ask in local cycling Facebook groups. Check if your bike shop has demo bags. REI’s rental program has expanded into bags in some locations. A friend lent me a Revelate Viscacha seat bag (the 16-liter version, around $145 new) for my first trip. That single loan let me test the concept before committing financially.
If you need to buy something, start with a seat bag. The Rockbros 10L seat bag runs about $35 on Amazon and is perfectly functional for a beginner. Not ultralight, not fancy, completely fine. Put your sleeping bag and shelter in there. Use a regular backpack for your first trip if needed — it’s not ideal, but it works.
Budget Reality Check
A realistic first-trip gear budget, assuming you already have a bike and basic cycling clothes, looks like this:
- Seat bag — $35-$145 depending on brand
- Sleeping bag (3-season) — $80-$200 (REI Trailbreak 30 is around $89 and solid)
- Sleeping pad — $40-$120 (Therm-a-Rest Z Lite Sol is $55 and practically indestructible)
- Shelter — $60-$300+ (borrow a tent if possible)
- Water filter — MSR TrailShot is $40 and fits in a jersey pocket
- Phone mount — $25-$50 (Quad Lock is worth it)
You can do a real first trip for under $300 in new gear if you borrow the big-ticket items. Don’t let gear costs be the reason you don’t go.
Test Everything Before You Leave
This deserves its own heading because I ignored it and paid for it. Load your bags, ride 15 miles, sleep in your backyard or a local campsite one night before the trip. A sleeping bag that’s “plenty warm” in your living room is not the same sleeping bag at 2 a.m. when it’s 44°F and you’re genuinely cold. A seat bag that feels secure at mile two starts to sway at mile 40 if you didn’t cinch the straps correctly. One shakedown night fixes these problems at home rather than in the middle of nowhere.
Route Planning for Your First Trip
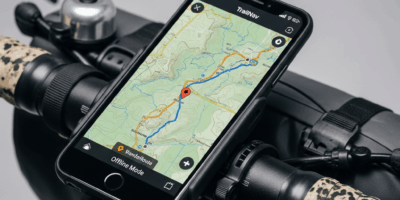
Two tools do most of the work here: Komoot and Bikepacking.com. Use both.
Komoot is a route planning app that pulls from OpenStreetMap data and overlays surface type — gravel, singletrack, paved, doubletrack. The free version gives you one region; a single region unlock is $4.99, and full world maps are a one-time $29.99. For your first trip, start by searching “bikepacking” or “gravel overnight” in your area and looking at routes other people have uploaded and reviewed. A route with 40 reviews and a note saying “mostly smooth gravel, good for loaded bikes” tells you more than any guidebook.
Bikepacking.com is where you find curated long routes with detailed write-ups — water sources, resupply towns, surface conditions, seasonal notes. For a first trip, you probably won’t be doing the full Arizona Trail, but the site’s shorter “route finder” section and the community forums are excellent for finding weekend-length options in your region. The write-ups are written by people who’ve actually ridden the routes, and they include the kind of detail that GPS tracks alone don’t tell you.
Evaluating Water and Resupply
Water is the variable that most first-timers underplan. Look at your route and identify every reliable water source — streams, rivers, campground spigots, towns with stores. Mark them on your map. Then calculate the longest gap between sources and plan your carry accordingly. In most temperate riding conditions, I carry 2-3 liters max, but I know exactly where I’m refilling. In the desert Southwest or in late summer when streams are low, that planning gets more serious.
For a 45-mile riding day, you’ll typically need one resupply point or a larger water carry. A filter makes any stream or river a viable source. The MSR TrailShot I mentioned earlier filters directly into your bottle — no pumping, no waiting, just drink. It’s the piece of gear I recommend every first-timer buy outright.
Food resupply on a two-night trip is usually simple — you’re carrying most of what you need. But identify at least one gas station, convenience store, or small grocery within reach of your route in case you run low or want a real meal. There is a specific joy in rolling into a small-town gas station at mile 38, completely filthy, and eating a hot slice of pizza from under a heat lamp. Do not skip this experience.
Download Everything Offline
Cell service on rural gravel routes is unreliable. Before you leave, download your Komoot route for offline use, download the relevant AllTrails or CalTopo map tiles, and screenshot your key waypoints. A GPS device like a Garmin Edge 530 (around $299) or the newer Edge Explore 2 ($349) removes the phone battery anxiety entirely and is worth considering if you’ll do more than one or two trips. For your first time out, a phone with offline maps and a battery pack — I use a 10,000mAh Anker PowerCore that fits in a top tube bag — is completely workable.
Common First-Trip Mistakes
I’ve made most of these. A few of them I’ve watched other people make while trying very hard not to say “I told you so.”
Overpacking
Humbled by the weight of my own gear on my first trip, I learned to weigh everything before it goes in the bag. The culprits are almost always: too many clothes, too much food for day one, and comfort items that feel necessary at home and feel like dead weight by mile 30. Pack for what you need, not for what might happen. A first aid kit should be 100 grams, not 600. Two pairs of socks are enough. You don’t need the camp chair.
A loaded bikepacking setup for a weekend trip should weigh somewhere between 15 and 25 pounds total — bags, gear, food, water. If you’re at 35 pounds, cut something. Go through the bag and physically hold each item. Ask whether it would ruin the trip if you left it home. If the answer is no, leave it home.
Underestimating Elevation
Miles and elevation are two different things. A 50-mile day with 4,500 feet of climbing is not the same as a 50-mile day on flat gravel. Komoot shows you elevation profiles clearly — use them. For a first trip, aim for no more than 3,000-3,500 feet of gain per riding day unless you have a strong fitness base and you’ve ridden loaded before. Elevation on a touring bike feels different than elevation on your regular ride. Physics doesn’t care about your training history when you’re carrying 20 extra pounds up a 12% grade.
Not Testing Gear Before Departure
Already covered the shakedown night above, but let me add one specific mistake I see constantly: people who buy a new tent, a new stove, and new bags and assemble all of it for the first time on the trail. Set up the tent in your living room. Figure out the stove at home where you have a backup option. Load the bags and ride with them before the actual trip. Every piece of gear should be familiar before you need it in the dark at a campsite after a long day.
Starting Too Late in the Day
Obvious in retrospect. Aim to start riding by 8 a.m. on day one. A late morning departure means you’re setting up camp in the dark, which is miserable and fixable. If you’re driving to the trailhead, stay nearby the night before. Get to the start point the evening before, sleep in your car or at a motel, and begin fresh in the morning. This single habit change will make your first trip significantly more enjoyable.
The first bikepacking trip is almost always imperfect. The bags shift, something gets forgotten, the weather doesn’t cooperate, and you’re slower than you planned. None of that matters. What matters is that you go, and that you come back with enough stories and enough hunger to immediately start planning the next one. That’s the whole point. Get out there this weekend.
Stay in the loop
Get the latest adventure cycling world updates delivered to your inbox.