What Chain Skipping Actually Feels Like
Chain skipping has gotten complicated with all the conflicting advice flying around. Half the forums tell you to replace everything. The other half say just tune your derailleur. Neither camp bothers asking you to describe what the skipping actually feels like — which is, honestly, the only thing that matters before you touch a single bolt.
There are two distinct versions of this problem. The first hits you mid-climb or mid-sprint: you’re pushing hard and the chain lurches up or down a cog without warning. It feels violent. Your leg drives down, nothing happens for a split second, then catches — like stepping on a stair that isn’t there. That split-second lurch is unmistakable once you’ve felt it. The second type is quieter and stranger. One specific gear skips repeatedly, whether you’re coasting or hammering. Usually the smallest cog or a middle chainring. Less dramatic, but more maddening, because eventually you can predict exactly when it’s coming.
These two sensations point to completely different problems. Load skipping — the violent kind — screams worn chain or cassette. Single-gear skipping usually means cable tension or alignment is off. That distinction alone saves hours of wrong fixes. That’s what makes diagnosing by feel so valuable to anyone who works on their own bike.
So, without further ado, let’s dive in.
Start Here — Check Chain Wear First
Probably should have opened with this section, honestly. I spent an entire Sunday afternoon once adjusting derailleur cable tension on my old Trek 7.3 FX before a neighbor pointed out my chain was so stretched it looked like taffy. A $12 tool would have saved me four hours of frustration.
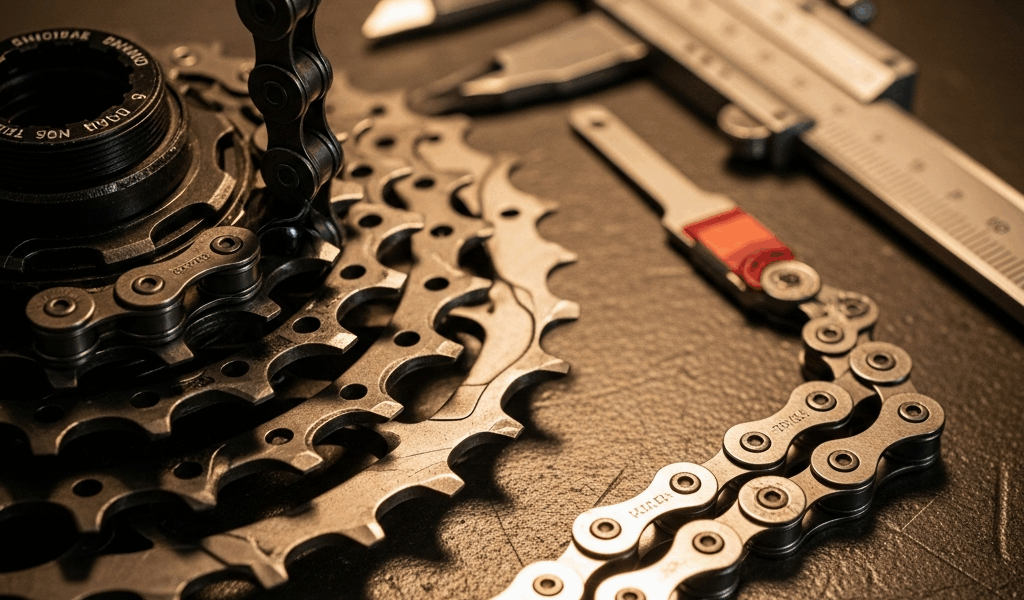
Get a chain wear indicator. The Park Tool CC-3.2 runs about $12 at any decent bike shop — hook it on a link, push down gently, and watch what happens. If it drops between the pins at the 0.75 marker, replace the chain immediately. If it falls at the 1.0 marker, you’re already deep in the danger zone. Most chains hold up somewhere between 1,500 and 2,000 miles, though mountain bikes running wet singletrack eat through them considerably faster.
But what is chain stretch, really? In essence, it’s wear on the chain’s internal pins and bushings that causes the links to spread apart slightly. But it’s much more than that — it’s also what destroys your cassette if you ignore it long enough.
A stretched chain accelerates cassette wear catastrophically. Give it another 200 miles and you’re suddenly replacing a $60 to $150 cassette alongside a $25 chain. Don’t make my mistake.
Here’s what matters: skipping across multiple gears, or specifically under hard load, almost always traces back to chain wear. Replace it first. Don’t adjust anything yet. New chain, fresh start — then test before moving forward. If the chain checks out and skipping continues? Move to cable tension.
If the Chain Is Fine, Check Cable Tension
Cable stretch is the most common fix I make on my own bikes. It’s also the easiest to miss, because the problem develops so gradually you forget what the bike felt like when everything was dialed in.
Derailleur cables stretch most aggressively during the first three weeks after installation. Then they stabilize — but never stop stretching entirely. When the cable loosens, the derailleur can’t move the chain far enough to engage the next cog cleanly. It skips. Same gear, every time.
Locate the barrel adjuster — the threaded cylinder where the cable meets the derailleur body. Most bikes have one there. Some have a second where the cable enters the frame. Start with the derailleur-mounted one. Counterclockwise tightens cable tension. Clockwise loosens it. Work in quarter-turn increments. Shift to the smallest cog, then shift up one gear and hold the shifter for a beat. The derailleur cage should move the chain onto the next cog cleanly, without hesitation or grinding. If it struggles, add another quarter turn counterclockwise and test again.
Most fixes happen within two full turns total. If you’ve gone past a full rotation in either direction and nothing improved, cable tension isn’t your problem — move on.
I’m apparently heavy-handed with barrel adjusters and overshooting the adjustment works for me while subtlety never does. Back it off when the cage starts rubbing the chain. Feel for the point where everything moves freely and the chain engages without noise. That’s it. That’s the sweet spot.
Inspect the Derailleur Hanger and Pulley Wheels
Overlooked by nearly everyone — at least until they crash or clip a pothole at speed. The derailleur hanger is a small aluminum tab where the derailleur bolts onto the frame. Bends easily. Kills shifting accuracy. Most riders have no idea it’s bent until a mechanic points it out.
Stand directly behind the bike and sight down the derailleur from the rear axle toward the cassette. The cage should run parallel to the cassette. If it angles inward or outward even slightly, the hanger is bent. Don’t try to straighten it by hand — you’ll crack it. Hangers run $15 to $40 depending on your bike’s make and model. That was $18 for my last replacement, a Specialized-specific unit I ordered directly from their site.
If the hanger looks straight, spin the two small pulley wheels — jockey wheels — inside the derailleur cage. They should spin freely and smoothly. A cracked, stripped, or barely-turning jockey wheel won’t grip the chain properly under load. Replacement sets run $20 to $30 and take about ten minutes to swap. Straightforward job, minimal tools required.
A bent hanger usually means something struck the derailleur hard enough that barrel adjusters simply cannot compensate. This is the wall you hit when earlier fixes go nowhere.
When the Cassette or Chainring Is the Problem
So you’ve replaced the chain. Cable tension is dialed. The hanger is straight and the jockey wheels spin freely. Still skipping?
Pull the bike into bright light and look at the cassette teeth. Healthy teeth are symmetrical — even triangles pointing toward the hub. Worn teeth look like shark fins. The leading edge curves gradually, the trailing edge hooks sharply backward. Chainring teeth wear the same way. Shark-fin wear means the old stretched chain ground against those teeth long enough to permanently reshape them. A new chain won’t mesh with that geometry. It skips.
Frustrated by this exact situation, I once tried running a new Shimano HG54 chain on a cassette I thought was borderline fine. Skipped constantly in three gears. Swapped the cassette two weeks later and the problem vanished entirely.
[X] might be the best option here — replacing the cassette alongside the chain — as proper drivetrain function requires matching wear between components. That is because mismatched pitch between a new chain and worn cassette teeth creates the same geometry problem all over again, regardless of how well everything else is adjusted.
Road bikes running Shimano 105 cassettes land between $50 and $80. Nicer groupsets climb past $150. Mountain bike cassettes typically split the difference at $80 to $120. Normal maintenance — not a failure of anything.
While you won’t need to replace the entire crankset, you will need a careful look at individual chainring teeth before committing to a bigger repair. One or two damaged teeth on an otherwise healthy chainring can often be solved with a single chainring swap — sometimes $30 to $60 — rather than a full crankset replacement.
Here’s the real takeaway: work through this in order. Chain first. Cable second. Hanger and jockey wheels third. Cassette last. Most skipping problems die at step one or two. The ones that don’t follow a logical sequence — and respecting that sequence is what separates a clean fix from an afternoon of chasing ghosts.


Stay in the loop
Get the latest adventure cycling world updates delivered to your inbox.