
How to Tell If Your Saddle Is Too High
Bike fit has gotten complicated with all the conflicting advice flying around. You don’t wake up one morning thinking something’s wrong. It’s more subtle than that — a weird feeling halfway through a ride, maybe only on longer efforts, and suddenly you’re questioning everything about your setup.
The first thing most riders notice is hip rocking. Film yourself from behind on a trainer — your phone propped against a water bottle works fine. Your pelvis should stay level and centered the whole time. If it’s tipping side to side with each stroke, like you’re sitting in a rocking chair, your saddle is almost certainly too high. One hip drops to chase the pedal while the other floats up. It looks wrong. It feels worse.
Then comes the knee ache — specifically behind the kneecap. Not sharp. More of a dull, building tightness that shows up around the 30-minute mark and lingers into the next morning. Your leg is overstretching at the bottom of each stroke. The joint spends the whole ride tugged into extension, loading muscles at angles they weren’t built to sustain.
Hot spots come next. Your foot goes numb in one specific patch — usually under the ball or along the inner edge. You’re unconsciously pressing harder into the pedal platform to get leverage. The saddle is forcing compensations your body never agreed to.
And finally, there’s just the feeling of reaching. At the bottom of the stroke, your leg feels stretched — not comfortably extended, but genuinely stretched, like you’re trying to touch something just past your fingertips. Your glutes don’t fire the way they should. Power drops for no reason you can name.
Why Saddle Height Creeps Up Over Time
Probably should have opened with this section, honestly. Knowing how the problem starts is what keeps you from solving it again six months from now.
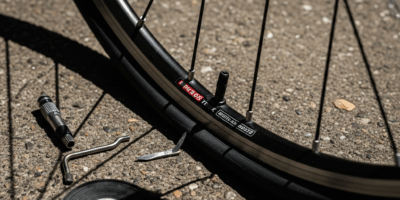
Most of the time, a slipping seat post is the culprit. You set it correctly, torque feels fine, and then one hard climb or a rough patch of trail nudges it down by half an inch. You feel the difference. You raise it back up — but you guess. No measuring tape, just a rough estimate. You go maybe a centimeter high to be safe. Two rides feel okay. Then the hip rocking is back.
Switching saddles without accounting for rail height creates its own mess. A Specialized Power and a Selle Italia SLR don’t sit at the same height just because the post measurement looks identical. The shapes are different. The rails sit differently. New saddle feels off, so you fiddle. You raise it, lower it, raise it again.
Cleat position matters more than most people think. Move your cleats forward on your shoe by even 3mm and your effective leg length just changed. A height that was dialed last month is now too high — and nothing else about your bike moved.
Then there’s the trap of copying a friend’s setup. Same bike model, different shoe stack heights, different cleat placement, maybe a 2mm crank length difference. You match their number. It doesn’t work. That’s what makes saddle fit so frustrating to us cyclists — the variables never stay constant.
How to Measure and Set the Right Height
Start with the heel-on-pedal check. It takes 60 seconds. Put your heel on the pedal at its lowest point. Your leg should be almost straight — not locked out, not bent. More than one finger fits under your heel? Too high. Heel doesn’t reach? Too low. Simple field test, surprisingly reliable.
The 109% inseam method gives you a solid baseline. Stand barefoot, hold a hardcover book snug between your legs the way a saddle would sit, and measure from the floor to the top of the book in centimeters. Multiply by 1.09. That’s your seat tube length from the bottom bracket center to the top of the saddle. Most riders land close to where they should be using this formula — at least if they’re running standard gear.
But here’s where people get tripped up. That formula assumes a standard cleat position, standard shoe stack height, standard crank length. A Shimano SPD-SL cleat sits lower than a Time ATAC. A 170mm crank versus a 175mm crank changes things. These aren’t small rounding errors.
The real test is still visual. Trainer, easy pace, moderate cadence, someone watching from behind. No hip rock. None at all. Zero side-to-side movement. That’s the goal — forget the math for a moment and chase that outcome.
Step by Step Fix With What You Have at Home
Grab a piece of electrical tape and mark your current seat post position on the post itself and on the seat tube. Takes two minutes. Do it anyway. You need a reference point in case things go sideways and you want to start over.
Drop your saddle in 2mm to 3mm increments. Not half an inch. Not a full centimeter. Small moves. This sounds overly cautious, but your body adapts to small changes within hours. Drop too much in one session and you swap hip rocking for quad dominance, lower back strain, or saddle pressure problems you didn’t have before. Don’t make my mistake — I once dropped 8mm in one go trying to speed up the process and spent a week dealing with new knee pain on the other side of the joint.
Ride for 15 minutes after each adjustment. Real road or trail, not just a trainer spin. Your body needs actual movement feedback — the kind you get from varying terrain and cadence — to tell you whether the height is right. Sit back in the saddle, pay attention to your hips, check in with your knees. These symptoms clear up fast once the height is correct. Not gradually over a week. Within one ride.
Check your seat post clamp torque while you’re at it. Most modern posts want somewhere between 4 and 6 Newton-meters — tight enough that it won’t slip under load, loose enough that you can shift it with deliberate hand pressure during adjustment. A post that drops half an inch on your first hard climb undoes everything. Tighten it back to spec once you’re locked in.
When the Fix Does Not Work — What Else to Check
Still getting symptoms after fixing saddle height? Fore-aft position is your next variable. Moving a saddle 1cm forward or back changes weight distribution, reach to the bars, and how your knee tracks over the pedal axle. Try shifting it forward 5mm, ride 15 minutes, and reassess from there.
Cleat position and float come right after that. Cleats sitting too far back add reach. Float that’s locked down too stiff forces your knee into a fixed tracking position that might not match your natural mechanics. I’m apparently someone with a slight valgus tracking tendency and 4.5-degree float works for me while zero-float cleats never did. Loosen the float slightly and run another 15-minute test.
Sharp knee pain — the kind that makes you stop mid-ride — is outside the scope of home saddle adjustments. That needs a proper professional bike fit, or a sports physio visit, or both. Self-fitting handles most comfort issues. It doesn’t diagnose structural problems.
Hip rocking gone? Knee tightness cleared? Foot numbness resolved? You fixed it. Write down the exact measurement — seat post exposed length, saddle height from the bottom bracket, whatever reference works for you. The formula that worked for your body, your shoes, your cleats, and your crank length is the one you use going forward. Not the generic number from a forum post.

Stay in the loop
Get the latest adventure cycling world updates delivered to your inbox.