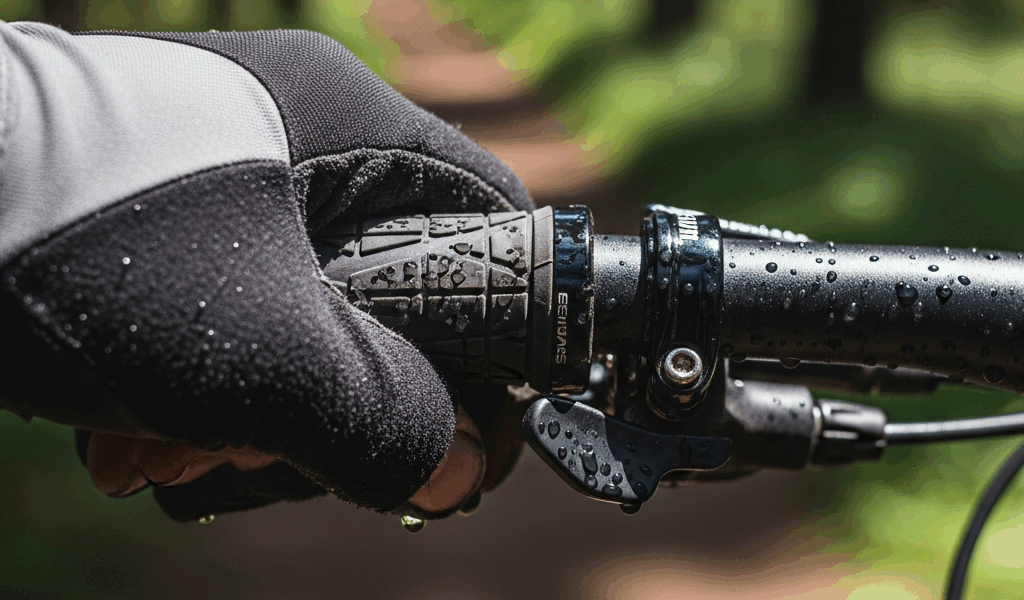
If a bike handlebar grip slips, stop riding until it can no longer twist or slide by hand. A moving grip can interfere with steering and braking. The correct fix depends on whether it is a bolt-clamped lock-on grip or a push-on grip held by friction.
For a lock-on grip, clean the handlebar and grip sleeve, inspect the clamp, then tighten its bolt only to the torque printed in that grip’s manual. For a push-on grip, remove contamination, inspect for stretching or damage, reinstall it using a method approved by its manufacturer, and allow every liquid or adhesive to dry completely before testing.
First identify the grip type
| Grip type | How to identify it | What usually secures it |
|---|---|---|
| Lock-on | One or two collars with small clamp bolts | A clamping sleeve tightened to a specified torque |
| Push-on or slip-on | No clamp bolt; flexible grip fits directly over the bar | A close friction fit, sometimes installed with an approved evaporating liquid or grip adhesive |
| Integrated control or throttle grip | Part of a shifter, e-bike control or powered-bike throttle | A product-specific mechanism; follow the bicycle or component manual |
This guide addresses ordinary bicycle grips on flat or upright handlebars. A rotating motorcycle or powered-bike throttle, damaged shift-grip unit, or integrated control requires its own manufacturer procedure.
Quick diagnosis: why the grip is moving
- Lock-on grip rotates: loose or incorrect bolt torque, contamination, a cracked collar, stripped threads, damaged inner sleeve, wrong installation or incompatible bar.
- Push-on grip rotates: water, oil, cleaner or old adhesive beneath it; a stretched or worn grip; an undersized or damaged bar; or insufficient drying after installation.
- Grip slides outward: installation or fit problem. A bar-end plug protects the open bar end but normally does not provide the grip’s primary retention.
- Only the rubber surface moves: the grip material may be separating from a rigid lock-on sleeve. Replace the grip rather than tightening the clamp harder.
Do not spray lubricant under a grip as a temporary fix. Oil and many penetrating products leave a residue that reduces friction and may affect rubber or plastic.
How to fix a slipping lock-on grip
1. Find the exact installation instructions
Identify the grip brand and model before touching the bolt. Clamp torque is not universal. Different Ergon manuals, for example, specify different values for different grip systems. Ergon’s official FAQ directs riders to the individual grip manual for the correct torque.
Use the specified metric hex key and a torque wrench or torque driver. Do not substitute a generic “2–3 Nm” or tighten until the grip stops moving; another product may require a different value, while excess torque can damage the collar, bolt, sleeve or handlebar.
2. Remove and inspect the grip
- Loosen the clamp bolt or bolts according to the manual.
- Slide the grip off without prying against the handlebar.
- Inspect the collar for cracks or distortion.
- Check bolt and insert threads for stripping, corrosion or cross-threading.
- Inspect the rigid inner sleeve. If the rubber rotates independently of that sleeve, replace the grip.
- Inspect the handlebar grip area for damage and verify that the component is approved for that bar.
A cracked clamp, damaged bolt, stripped thread or deformed sleeve is a replacement issue. Thread-locking compound, friction paste, tape or a longer bolt should not be improvised unless the component manufacturer expressly calls for it.
3. Clean the contact surfaces
Clean the handlebar grip area and the inside of the lock-on sleeve with a non-residual cleaner allowed by both manufacturers. Park Tool’s flat-bar grip procedure uses isopropyl alcohol to remove contaminants and oil.
For a carbon handlebar, follow the bar maker’s cleaning restrictions. Do not scrape, score or sand the carbon surface. If the bar is gouged, crushed, cracked or otherwise suspect, stop and have it inspected.
4. Reinstall and torque correctly
Slide the grip fully into its specified position, align any left/right or orientation marks, and keep the clamp on the straight grip section required by the manual. Tighten in the stated sequence and to the product-specific torque. Reposition brake and shift levers if necessary so they remain reachable without changing hand position.
Install the correct bar-end plug or closed-end protection. Then try firmly to twist and slide the grip by hand. If it still moves at the specified torque, do not exceed that torque. Recheck compatibility and replace the damaged or incorrect part.
How to fix a slipping push-on grip
1. Remove it without damaging the bar
Park Tool describes using compressed air or a small amount of rubbing alcohol to create a temporary gap beneath a push-on grip. If cutting is the only removal method, do not use a blade on a carbon handlebar; scoring carbon can weaken it. Take the bicycle to a shop if removal cannot be done without risking the bar.
Use compressed air only with suitable equipment, eye protection and controlled pressure. Keep the nozzle, grip and debris directed away from faces and bystanders.
2. Clean and inspect
Remove dirt, oil and old adhesive from the bar using a cleaner approved for the bar material. Allow the surface to dry. Inspect the grip’s inner bore for tearing, permanent stretching, hardening or separation. A loose, split or distorted grip should be replaced rather than glued back onto the bicycle.
Check that the grip is intended for the handlebar and the application. Do not try to compensate for an incompatible diameter by wrapping the bar with random tape; that can create an uneven or unreliable fit.
3. Use the grip maker’s installation method
Some push-on grips can be installed with compressed air. Others allow isopropyl alcohol, adhesive spray, hairspray or a dedicated grip adhesive. Park Tool notes that alcohol can serve as a temporary installation lubricant and that adhesive spray can lubricate while wet and adhere after drying. Ergon similarly describes alcohol or an appropriate adhesive as possible methods, depending on the grip.
That does not make every solvent or adhesive safe for every grip and bar. Follow the grip and handlebar instructions. Avoid gasoline, oil, general-purpose grease and unapproved aggressive solvents. Use adhesives only with adequate ventilation and according to their label.
4. Wait until completely dry
Installation liquid trapped under a grip can make it rotate. Drying time depends on the product, temperature, humidity and amount used; a universal five-minute or 24-hour rule is not reliable. Follow the product instructions and wait longer if any movement remains.
Before riding, twist and pull the grip forcefully by hand. It should not rotate, slide or feel wet. If it moves, remove it and diagnose the fit rather than hoping it will settle during the ride.
What not to do
- Do not ride with a grip that moves by hand.
- Do not exceed the grip’s specified clamp torque.
- Do not use a guessed hex-key size that rounds the bolt.
- Do not lubricate the installed grip with WD-40, oil or grease.
- Do not cut or pry against a carbon handlebar.
- Do not assume a bar-end plug will secure a loose grip.
- Do not hide an incompatible fit with layers of improvised tape.
- Do not reuse a cracked collar, stripped bolt or delaminated grip.
When the grip should be replaced
Replace it when the rubber is cracked, torn, sticky from material breakdown, hardened and slick, or separating from its sleeve. A push-on grip that remains loose on a clean compatible bar after correct installation is likely stretched or damaged. A lock-on grip with a cracked collar, stripped thread or damaged inner sleeve is not repaired by more torque.
Choose a replacement by compatibility, hand fit and intended use—not by a supposed universal diameter or price tier. Grip outside diameter affects hand comfort, while the inside fit and clamp design determine compatibility. Confirm available handlebar space, controls, bar-end arrangement and the manufacturer’s restrictions, particularly with carbon bars.
Final safety check
- Try to rotate and slide both grips by hand.
- Confirm clamp bolts are at the specified torque, if applicable.
- Confirm bar ends are protected with the required plugs or closed grip ends.
- Verify brake and shift controls are secure and reachable.
- Take a short, low-speed test ride away from traffic and technical terrain.
- Recheck the grip before the next demanding ride.
Bottom line
A slipping bike grip is a safety defect, not an annoyance to tolerate. Lock-on grips require an undamaged clamp and the exact torque from their own manual. Push-on grips require clean, compatible surfaces, an approved installation method and complete drying. If correct installation does not make the grip immovable, replace the grip or have the handlebar and controls inspected before riding.


Stay in the loop
Get the latest adventure cycling world updates delivered to your inbox.