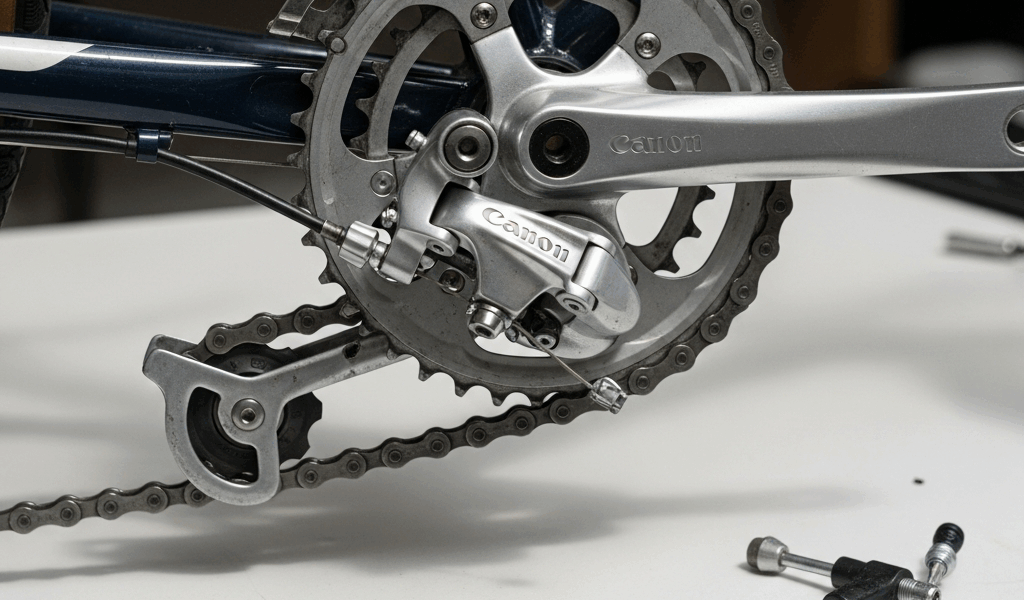
If a front derailleur will not shift up to the large chainring, do not start by turning the high-limit screw. First determine whether the shifter moves the derailleur, whether the cage is obstructed or damaged, and whether the system is mechanical or electronic. Cable tension, cable/housing friction, cage position, compatibility and the outer limit are separate faults.
Incorrect adjustment can throw the chain beyond the large ring, damage a component or cause a loss of control. Work with the bicycle supported securely, turn the cranks by hand, and use the service manual for the exact derailleur model.
Fast Diagnosis: What Does the Derailleur Do?
| Test result | Likely area | Next check |
|---|---|---|
| Shifter clicks, but derailleur does not move | Broken/slack cable, housing problem, disconnected anchor, seized pivot | Inspect the full cable path and move the derailleur gently by hand |
| Cage moves outward but chain stays on small ring | Insufficient travel/tension, cage height/rotation, chainring or compatibility issue | Compare cage position with the model’s dealer manual |
| Cage stops at a firm outer limit | High-limit setting or model-specific setup | Confirm all other setup items before making a tiny limit adjustment |
| Shift is slow in both directions | Cable/housing friction, dirty pivot, damaged cable | Inspect for corrosion, kinks, contamination and free pivot movement |
| Electronic derailleur is silent | Battery, connection, pairing, crash mode or system fault | Use the manufacturer’s electronic-system diagnostics |
| Chain shifts past the big ring | Outer limit too open, cage misalignment or incompatible setup | Stop pedaling; do not keep loosening the H limit |
Step 1: Identify the System and Exact Model
Mechanical front derailleurs use a cable. Electronic Shimano Di2 or SRAM AXS systems use motors and model-specific adjustment procedures. Cable-tension advice does not apply to an electronic derailleur.
Find the model marking on the derailleur and download its manufacturer manual. Modern toggle-link, side-swing, braze-on, clamp-on and electronic models do not share one universal screw direction, clearance or setup sequence. SRAM, for example, warns that some AXS high-limit screws are reverse-threaded and must be adjusted with the derailleur in the outboard position.
Also confirm that the shifter, chain, crankset, chainring tooth difference and derailleur are compatible. Shimano’s compatibility information notes that front-derailleur performance depends on the tooth differences and cage shape specified for the crankset.
Step 2: Inspect Before Adjusting
Shift to the small chainring if the system still responds. Look for:
- a frayed, rusty, kinked or disconnected inner cable;
- split, crushed or sharply bent housing;
- a cage that is bent, cracked or touching the chainring;
- a loose derailleur mount;
- mud or corrosion at the pivots;
- a damaged shifter or lever with no normal click/throw;
- incorrectly routed cable at the anchor bolt; and
- a chain or chainring with visible damage.
Do not pull hard on a visibly frayed cable; sharp strands can puncture skin. Replace damaged cables and housing rather than adding more tension. A cracked cage, loose mount, damaged chainring or electronic fault belongs with a qualified mechanic unless the manufacturer provides an appropriate user procedure.
Step 3: Test Cage Movement
With the bicycle stable and the rear wheel free to turn, rotate the cranks slowly by hand while operating the shifter. Keep fingers, clothing and tools away from the moving chain and chainrings.
For a mechanical derailleur, observe whether the cable tightens and the cage moves outward. If there is no cage movement, disconnecting or resetting the cable may eventually be required—but first check whether the shifter pulls cable and whether the cage pivots freely. Park Tool identifies cable friction from grit or rust as a common cause of slow or inconsistent shifting.
If the derailleur moves freely by hand but not from the lever, investigate the cable, housing, anchor routing and shifter. If it will not move freely by hand, do not overcome it by excessive lever force; inspect the pivot, obstruction, damage and limit position.
Step 4: Check Cable Tension in Small Increments
On many mechanical indexed systems, insufficient cable tension prevents the cage from traveling far enough outward. The barrel adjuster may be at the shifter, frame stop, inline in the housing or integrated into the derailleur. Some systems have no ordinary barrel adjuster.
Before turning it:
- photograph or mark the starting position;
- confirm which direction increases tension for that system;
- turn only a quarter-turn;
- pedal lightly by hand and test the shift; and
- stop if the chain approaches the outside edge of the large ring.
Counterclockwise movement commonly lengthens the housing path and increases cable tension, but do not assume that rule covers every integrated or model-specific adjuster. If the adjuster reaches the end of its range, the cable may require a proper reset at the anchor bolt according to the dealer manual. Do not keep forcing the adjuster.
Step 5: Verify Cage Height and Rotation
A cage that is too high, too low or rotated can shift poorly even with correct cable tension. Park Tool’s general guidance places the outer cage plate roughly 1–2 mm above the tallest tooth of the large chainring and approximately parallel to the chain. Some Shimano manuals specify different installation ranges or use a supplied alignment block; some mounts preset one or both dimensions.
Use the exact manufacturer specification rather than a credit card or an assumed universal gap. Before loosening a clamp:
- record the current height and rotation;
- shift to release cable tension as instructed;
- use the specified tool and tightening torque;
- ensure the cage cannot contact the chainring; and
- recheck both height and rotation after tightening.
A braze-on mount or setup tool may impose a different sequence. If the frame mount is damaged or the derailleur will not align within its permitted range, stop and have it inspected.
Step 6: Adjust the High Limit Only After Diagnosis
The high limit restricts outward travel so the chain does not shift beyond the large chainring. It is not a general “make it shift better” screw. If cable tension, cage alignment or compatibility is wrong, opening the high limit can mask the fault while increasing chain-drop risk.
Follow the exact manual’s chain position and clearance measurement. Make changes in approximately one-eighth-turn increments, then test by hand. Park Tool’s generic procedure recommends loosening the H limit only slightly when the cage reaches the limit but the shift remains slow, and tightening it when the chain overshifts outside the large ring.
Do not copy screw direction from another derailleur. SRAM specifically documents reverse-threaded high-limit hardware on certain AXS systems and warns that adjusting it in the wrong derailleur position can cause permanent damage.
Electronic Front Derailleur Not Shifting
For Di2 or AXS, check the system rather than looking for cable tension:
- confirm the battery is charged and correctly installed;
- inspect accessible connections according to the user manual;
- confirm the shift buttons are assigned and paired;
- check the manufacturer app for faults, firmware and adjustment mode;
- review crash-recovery instructions; and
- use model-specific micro-adjustment and limit procedures.
Do not force an electronic cage by hand unless the manufacturer explicitly instructs it. Motor damage is not repaired by loosening a mechanical limit screw.
Problems That Look Like a Front-Derailleur Fault
- Shifting under heavy load: front shifts need reduced pedal force; forcing a shift on a climb can stall or drop the chain.
- Wrong chainline or crankset: changed bottom brackets or chainrings can move the rings outside the derailleur’s intended position.
- Incompatible chainring difference: the derailleur may not support the installed tooth range.
- Worn or damaged chainring teeth: adjustment cannot restore the designed pickup features.
- Cross-chaining or trim position: light cage rub in extreme gear combinations is not necessarily a failed shift.
- Rear-shifting problem: first confirm which derailleur and chain movement actually produce the symptom.
If shifting is poor at both ends of the drivetrain, use our general bike-shifting diagnostic to separate front, rear, cable and chain symptoms.
When to Stop and Visit a Bike Shop
Get professional help when the cage or mount is bent/cracked, the chainring is damaged, a cable is badly frayed inside a shifter, an electronic system reports a fault, the chain repeatedly drops, the correct torque is unknown, or the drivetrain parts may be incompatible. Test every repair in a traffic-free area before returning to the road or trail.
Front Derailleur FAQ
Why does my front derailleur move but not shift up?
The cage may not travel far enough, may be too high or rotated, or may be incompatible with the chainrings. Check cable tension and cage setup before touching the outer limit.
Should I loosen the H screw?
Only when diagnosis and the exact service manual show the outer limit is preventing required travel. Change it in tiny increments and stop if the chain can overshift.
Why is my front shifter not moving the derailleur?
Common causes include a broken/slack cable, damaged housing, incorrect cable routing, a shifter fault, seized pivots or—on electronic systems—a power or connection problem.
Can I ride with a broken front derailleur?
Do not ride if the cage is loose, cracked, contacting the chainring, dropping the chain or capable of entering moving parts. A mechanic can determine whether the bike can safely be configured temporarily in one chainring.
Technical Sources
- Shimano dealer manual: current road front-derailleur setup and adjustment
- Shimano compatibility: front derailleurs and cranksets
- SRAM: AXS front-derailleur adjustment
- Park Tool: Front Derailleur Adjustment
- Park Tool: Advanced Front-Derailleur Troubleshooting
Procedures checked August 3, 2026. Manufacturer instructions for the exact model override generic guidance.
When the chain passes completely inside or outside a front chainring, use our bike-chain derailment guide to inspect derailleur limits, mounting, chain line, and damaged components safely.



Stay in the loop
Get the latest adventure cycling world updates delivered to your inbox.