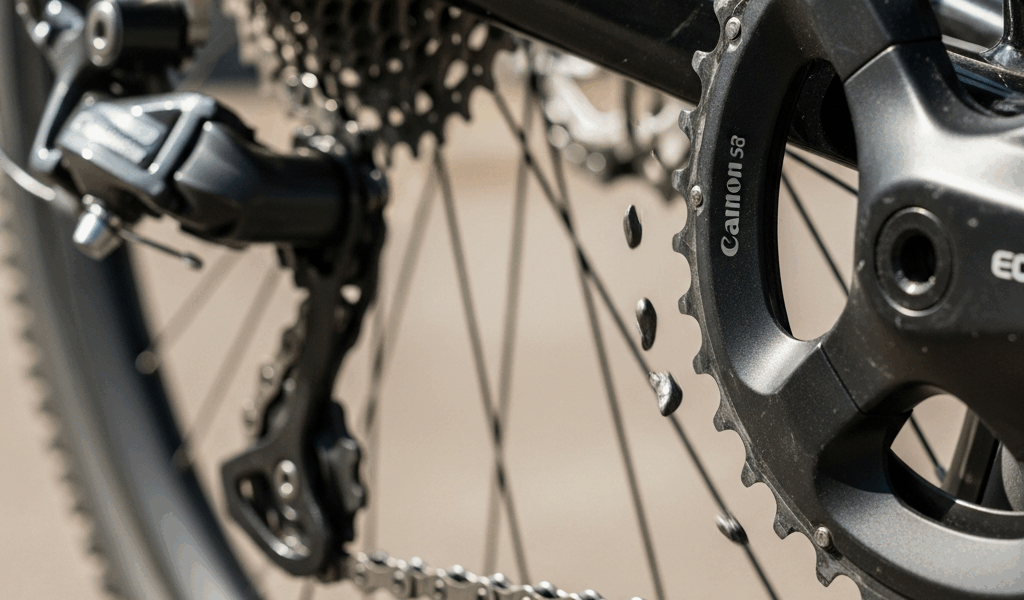
A bike chain that keeps falling off usually has a location-specific cause. If it drops off the front chainring, inspect the front derailleur, chainring, chain line, and chain retention. If it runs beyond the cassette, check rear-derailleur limit adjustment and hanger alignment. If it comes off a single-speed bike, inspect chain tension, wheel alignment, and tight spots.
Do not begin by turning every derailleur screw. First note where the chain lands and what you were doing—shifting, pedaling hard, coasting over bumps, or backpedaling. That evidence points to the correct system and prevents a small indexing problem from becoming a chain-in-the-spokes failure.
Stop riding immediately if this happened
- The chain went between the cassette and spokes.
- The rear derailleur or hanger looks bent after a crash or transport.
- The chain is wedged between the crank and frame or has damaged the frame.
- A link is cracked, a pin is protruding, or a quick link is partly open.
- The derailleur cage, chainring, cassette, or wheel is loose.
- The drivetrain binds instead of rotating freely.
A derailleur pulled into the wheel can damage spokes, lock the rear wheel, and cause a crash. Do not pedal harder to free a jam. On an e-bike, switch the system off and follow the manufacturer’s battery-isolation instructions before placing hands near the drivetrain.
Put the chain back on safely
- Move off the road and stabilize the bike. Shift the rear shifter toward the smallest rear cog if the mechanism still moves.
- Turn off an e-bike. Keep fingers away from sprockets while another person turns the pedals.
- Pull the rear derailleur cage forward to create slack, place the chain on the smallest chainring or a middle section of the chainring, and seat it on a rear cog.
- Lift the rear wheel and rotate the crank forward slowly by hand. Stop if the chain binds, climbs a tooth incorrectly, or the derailleur approaches the spokes.
- Inspect for the cause before riding. Reinstalling the chain is not the repair.
Diagnosis table: where did the chain fall?
| Where or when it drops | Likely causes | First check |
|---|---|---|
| Off the large chainring toward the crank | Front high limit, derailleur position, excess cable movement, bent ring | Front derailleur cage and high-limit setup |
| Inside the small chainring toward the frame | Front low limit, derailleur alignment, chain line | Low-limit clearance and frame damage |
| Past the smallest rear cog toward the dropout | Rear high limit or bent hanger | Rear derailleur alignment and H limit |
| Past the largest rear cog into spokes | Rear low limit, bent hanger, loose cassette/wheel | Stop riding; inspect hanger and L limit |
| Jumps between rear gears but stays on cassette | Indexing, cable friction, hanger alignment, worn drivetrain | Separate skipping from full chain drop |
| Falls on rough ground on a 1x bike | Weak/no clutch, worn narrow-wide ring, excessive chain length, poor chain line | Clutch state, chainring teeth, chain length |
| Falls from a single-speed or child’s bike | Loose tension, crooked wheel, eccentric sprockets/chainring, damaged chain | Chain slack through a full crank revolution |
| Drops once per crank revolution | Bent chainring, damaged tooth, stiff link, chainring wobble | Rotate slowly and watch the same point return |
Front derailleur: chain falls off the chainring
A front derailleur uses a cage to move the chain between chainrings. Its height, rotation, cable tension, and low/high limits work together. A limit screw does not “make shifting better” in general; it restricts the cage at one end of its travel.
Chain drops outside the large ring
The high limit may allow the cage too far outward, but first confirm that the derailleur is mounted at the manufacturer’s specified height and parallel alignment. A cage that is rotated or too high may throw the chain even when the limit looks close. Check for a bent large chainring and excessive crank or bottom-bracket play.
If position and hardware are sound, follow the derailleur manufacturer’s setup order and adjust the high limit in very small increments. Test the shift repeatedly without forcing the lever. Park Tool’s front derailleur adjustment guide illustrates the relationship among mounting, limits, and indexing.
Chain drops inside toward the frame
The low limit may permit too much inward travel. Also check derailleur alignment, frame or chain-catcher position, crank play, and whether the chain line is suitable for the components. Protect the frame from further damage. A chain catcher can reduce consequences, but it does not correct a badly adjusted derailleur.
Avoid shifting the front under maximum pedal force. Ease pressure briefly while continuing to rotate the cranks; this lets the chain move without being driven sideways under full load.
Rear derailleur: chain leaves the cassette
Chain falls toward the dropout
If the chain travels beyond the smallest cog, the high limit may be too permissive or the derailleur/hanger may be misaligned. Verify that the rear wheel is fully seated and the cassette has no side play. Then sight the hanger and derailleur from behind. A visibly bent hanger should be measured with an alignment tool or replaced as appropriate—not straightened by pulling on the derailleur.
Chain falls into the spokes
This is the higher-risk direction. The low limit should prevent the derailleur from guiding the chain beyond the largest cog. A bent hanger can defeat an apparently correct limit. Stop riding and have alignment, wheel seating, cassette security, derailleur condition, and the low limit checked. A spoke-protector disc is a backup; it is not a substitute for correct adjustment.
Use the component maker’s manual or Park Tool’s rear derailleur adjustment procedure. Limit screws, B-gap, and indexing perform different jobs and should be set in the specified sequence.
Bent derailleur hanger
A hanger can bend in a crash, when the bike falls on the drive side, or during transport. Symptoms include good shifting in part of the cassette but poor alignment elsewhere, noise in several gears, or a chain that approaches the spokes. Visual inspection can detect a severe bend, but a small error requires a derailleur-hanger alignment gauge.
Remove or support the derailleur according to the frame and component instructions. Replace a cracked or severely damaged replaceable hanger. Carbon frames, direct-mount systems, and some full-suspension bikes have specific procedures; do not improvise leverage against the frame. See Park Tool’s hanger alignment overview.
Worn chain, cassette, or chainring
Chain wear more often causes poor engagement or skipping under load than a complete derailment, but worn parts can contribute to unstable chain tracking. Inspect for hooked, bent, or missing teeth; side play; a stiff link; a damaged quick link; and excessive chain elongation.
Measure wear with a gauge suitable for the drivetrain and use the chain/component manufacturer’s replacement threshold. Different drivetrain speeds and manufacturers may specify different limits. Replacing a chain after prolonged wear may reveal a cassette that has worn to match it, causing a new chain to skip. Park Tool’s chain-wear guide explains measurement methods.
Chain length, chain line, and 1x retention
A chain that is too long can lose tension on rough terrain; one that is too short can damage the derailleur when shifted to a large sprocket. Size the chain using the drivetrain manufacturer’s procedure. Do not remove links merely because the cage appears relaxed in one gear.
Modern 1x systems depend on compatible chain line, a narrow-wide chainring, correct chain length, and often a clutch rear derailleur. Confirm that the clutch is engaged when the design requires it. Worn narrow-wide teeth, an incompatible ring/chain combination, suspension growth, or an incorrect chain line can cause repeated drops. A chain guide may add security for aggressive riding, but correct the underlying setup first.
Cross-chaining and shifting technique
On a multi-chainring drivetrain, extreme combinations create a severe chain angle—such as the largest front ring with the largest rear cog. Some drivetrains tolerate more angle than others, but persistent noise is a sign to select a straighter combination. Backpedaling in an extreme gear can also cause the chain to walk across the cassette on some setups.
Shift while applying light, steady pedal force rather than standing on the pedals. Do not shift multiple front and rear steps simultaneously under load. Technique will not compensate for incorrect limits or a bent hanger, but it prevents avoidable drops on a correctly adjusted bike.
Single-speed and children’s bikes
A single-speed chain needs enough slack to articulate without binding and enough tension to remain engaged. The correct method and allowance depend on horizontal dropouts, track ends, an eccentric bottom bracket, sliding dropouts, or a tensioner. Follow the frame maker rather than applying one universal measurement.
- Check that axle nuts or the thru-axle are secure to specification.
- Rotate the cranks through a full revolution and find the tightest point; chainrings and sprockets are rarely perfectly concentric.
- Set tension at the tight point using the frame’s adjustment system.
- Align the rear wheel and verify that the front chainring and rear sprocket share the intended chain line.
- Inspect the chain and teeth, then torque fasteners to the component specifications.
On a child’s bike with a coaster brake or enclosed chain guard, brake function and guard clearance add complexity. A bicycle shop is the safer choice if wheel position affects brake setup or the guard must be removed.
What not to do
- Do not tighten both limit screws randomly.
- Do not bend a derailleur by hand while it is attached to the hanger.
- Do not shorten the chain without applying the manufacturer’s sizing method.
- Do not lubricate a dirty chain without cleaning and inspecting it.
- Do not test a questionable adjustment at speed or in traffic.
- Do not keep riding after a chain enters the spokes or jams against the frame.
Final test before riding
- On a workstand or with the rear wheel safely raised, rotate the drivetrain and shift one gear at a time.
- Confirm the chain cannot travel beyond either end of the cassette or chainring range.
- Check every gear for noise, rubbing, binding, and adequate derailleur capacity.
- Inspect the quick link or joining pin, wheel retention, crank, cassette, and derailleur fasteners.
- Perform a slow test ride away from traffic. Apply load gradually and stop if the chain approaches an edge or skips.
If the chain stays on but jumps forward under pedal pressure, that is a separate symptom. Use our chain-skipping diagnostic guide. If shifts are generally slow or noisy, see the bike shifting troubleshooting guide.
Frequently asked questions
Why does my bike chain keep coming off?
The common causes are incorrect derailleur limits, a bent hanger, poor indexing, a damaged chainring or link, incorrect chain length or line, worn retention parts, and improper single-speed tension. Where the chain lands identifies which system to inspect.
Can a loose bike chain keep falling off?
Yes, especially on single-speed bikes and on 1x drivetrains over rough terrain. “Loose” can result from incorrect chain length, poor wheel/tensioner position, or a clutch problem. Use the manufacturer’s sizing or tension procedure.
Why does the chain fall off when I shift?
A limit or derailleur-position problem can guide it beyond the intended sprocket or chainring. A bent hanger, excessive cable movement, worn teeth, or shifting under heavy load can contribute.
Can I ride after putting the chain back on?
Only after inspecting the cause and confirming that the chain, derailleur, hanger, wheel, cassette, and frame are undamaged. Do not ride if it entered the spokes, jammed against the frame, or damaged a link.


Stay in the loop
Get the latest adventure cycling world updates delivered to your inbox.